Kombucha
I know I'm behind on this trend, but I've finally looked into the kombucha tea phenomenon. In case you are as unenlightened as I was, kombucha is a type of mushroom, and tea is well...tea. You let the two marry for a week on your counter, and tada! You have a drink that's yummy, non alcoholic and loaded with probiotics and enzymes. The trend follows right in the footsteps of the country's current obsession with "live" food. Food that's been soaked, sprouted, fermented etc within an inch of its life, into living breathing bacteria laden dinner (or in this case, beverage). Once upon a time, bacteria was a bad word, but now hip and healthy people like to sort their bacterium into two categories "Bad" and "Good". Good bacteria is in short supply in most of our digestive systems these days...hence crunchy America's fascination with all things probiotic.
If I'm being entirely honest, the process of making kombucha is disgusting. Also, there are several doctors that think the whole thing is deep hooey. You are forewarned.
Here's the recipe I followed.
You can buy a SCOBY ( Symbiotic Culture of Bacteria and Yeast). Or you can just pick up a bottle of Kombucha at Whole Foods, and grow your own from the mushroom floating around the bottom of the bottle. I did neither. Rather my sister Liz did the ugly job, grew one massive mother of all SCOBY mothers, and gave me one of her many many many SCOBY babies. (note: these are her hands. My hands are at a safe distance pushing the shutter button on the camera. I must confess I gagged when I touched the SCOBY. It feels both alive and dead...basically a zombie mushroom).

Here's my SCOBY baby hanging out with the tea. (note: The term "baby" is strictly used scientifically by me and in no way denotes endearment for said zombie mushroom).

I happen to like the taste of kombucha tea, it tastes kind of like a cross between soda and beer to me. But if you don't like beer, you're probably going to want to add some flavoring when you bottle it. I did raspberry ginger kombucha for fun.


After my kombucha was done brewing, I used recycled bottles to bottle up my own and store in the fridge (note: the row of pretty bottles in my fridge is finally the first attractive thing about this whole process).

I should also note, that I most definitely would not have survived this process without my sister's help. Besides the SCOBY baby, she also provided the bottle caps and bottle-capping-apparatus. Plus, she has bizarrely strong hands that can manhandle said bottle-capping-apparatus that was apparently designed to be used only by Samson. Me? Not so much.

See? Pretty. Whew.
If I'm being entirely honest, the process of making kombucha is disgusting. Also, there are several doctors that think the whole thing is deep hooey. You are forewarned.
Here's the recipe I followed.
You can buy a SCOBY ( Symbiotic Culture of Bacteria and Yeast). Or you can just pick up a bottle of Kombucha at Whole Foods, and grow your own from the mushroom floating around the bottom of the bottle. I did neither. Rather my sister Liz did the ugly job, grew one massive mother of all SCOBY mothers, and gave me one of her many many many SCOBY babies. (note: these are her hands. My hands are at a safe distance pushing the shutter button on the camera. I must confess I gagged when I touched the SCOBY. It feels both alive and dead...basically a zombie mushroom).
Here's my SCOBY baby hanging out with the tea. (note: The term "baby" is strictly used scientifically by me and in no way denotes endearment for said zombie mushroom).
I happen to like the taste of kombucha tea, it tastes kind of like a cross between soda and beer to me. But if you don't like beer, you're probably going to want to add some flavoring when you bottle it. I did raspberry ginger kombucha for fun.
After my kombucha was done brewing, I used recycled bottles to bottle up my own and store in the fridge (note: the row of pretty bottles in my fridge is finally the first attractive thing about this whole process).
I should also note, that I most definitely would not have survived this process without my sister's help. Besides the SCOBY baby, she also provided the bottle caps and bottle-capping-apparatus. Plus, she has bizarrely strong hands that can manhandle said bottle-capping-apparatus that was apparently designed to be used only by Samson. Me? Not so much.
See? Pretty. Whew.
Silly Voices Cube
Getting stubborn preschoolers/kindergarteners to do what you want them to, is somewhat akin to people who insist on driving 65 in the fast lane. It drives you crazy and there's nothing on heaven or earth that can induce them to do otherwise.
For school this year, we're doing Classical Conversations and consequently Jamie has a ton of memory work. I think the idea behind the classical method, is that small children naturally repeat everything they hear, but I'd revise that to say mine mostly just repeat everything they're not supposed to. I can recite Latin vocabulary all day, but the only word Jamie remembers at the end is that "sed = but" (which is not nearly as funny as he thinks it is).
So I go through great lengths to try and involve all the five senses and make learning as fun as possible (to balance the times when I want to bash my head against the wall). Someone around here tossed out a delightfully shaped amazon box, that was just begging to be torn apart and reborn into something new. A quick (ahem, not so quick) dance with google images and photoshop, and I proudly bring you this (now) simple means for manipulating children.
The Silly Voices Cube.
Materials:
Box
Knife
Paint
Tape/glue/some other sort of adhesive
Silly Voices Print-out
Directions:
1) Unless you are lucky enough to come across a perfectly square box (like an Einstein bagel box), you'll first have to cut the long sides of your box and re-tape it so that it is perfectly square.
2) Paint it. For optimal success, let children pick the colors and paint it (it doesn't turn out quite as pretty, but it's more fun).

3) Print and cut out this Silly Voices Sheet and be grateful you didn't burn dinner while searching for a DRM-free robot picture.
(note: make sure you save it and print it out as an 8x10 or a fit to margins option)

4) Glue or tape your voices to your cube. I wanted mine to be fairly waterproof (drool proof, throw up proof...whatever), so I laminated mine right onto my cube.

5) Ta-daa. Super easy.

We gave it a practice run by counting by 5's in a monster voice. Too hilarious.

I dare any 5 year old to try and recite the Pledge Of Allegiance in a baby voice without busting a gut laughing.
For school this year, we're doing Classical Conversations and consequently Jamie has a ton of memory work. I think the idea behind the classical method, is that small children naturally repeat everything they hear, but I'd revise that to say mine mostly just repeat everything they're not supposed to. I can recite Latin vocabulary all day, but the only word Jamie remembers at the end is that "sed = but" (which is not nearly as funny as he thinks it is).
So I go through great lengths to try and involve all the five senses and make learning as fun as possible (to balance the times when I want to bash my head against the wall). Someone around here tossed out a delightfully shaped amazon box, that was just begging to be torn apart and reborn into something new. A quick (ahem, not so quick) dance with google images and photoshop, and I proudly bring you this (now) simple means for manipulating children.
The Silly Voices Cube.
Materials:
Box
Knife
Paint
Tape/glue/some other sort of adhesive
Silly Voices Print-out
Directions:
1) Unless you are lucky enough to come across a perfectly square box (like an Einstein bagel box), you'll first have to cut the long sides of your box and re-tape it so that it is perfectly square.
2) Paint it. For optimal success, let children pick the colors and paint it (it doesn't turn out quite as pretty, but it's more fun).

3) Print and cut out this Silly Voices Sheet and be grateful you didn't burn dinner while searching for a DRM-free robot picture.
(note: make sure you save it and print it out as an 8x10 or a fit to margins option)

4) Glue or tape your voices to your cube. I wanted mine to be fairly waterproof (drool proof, throw up proof...whatever), so I laminated mine right onto my cube.

5) Ta-daa. Super easy.

We gave it a practice run by counting by 5's in a monster voice. Too hilarious.

I dare any 5 year old to try and recite the Pledge Of Allegiance in a baby voice without busting a gut laughing.
Homemade Pullups
or... how to turn fitteds into training pants.

I've half heartedly had Charlie potty trained for awhile, but last Saturday I woke up and decided it's time to stop changing diapers for good. I never really hated the diaper stage (as much as I hate say...reality television or traffic on the five), so I wasn't in a terrible hurry to potty train. I think my ambivalence this time definitely had to do with cloth diapers. They were so cute, and soft I didn't want to give up that last vestige of babyhood. (even though in full disclosure, I switched to disposables after Charlie turned two)
Charlie, like his brother before him, transitioned fairly seamlessly to life in underwear, unlike Jamie, it did not require shooting Charlie's diapers with a 12 gauge to accomplish the transition. However, sometimes you just need pullups. Naps, road trips, gymnastics, life is too full of opportunities for major accident catastrophes, but pull ups are outrageously expensive. So I pulled out a box of half-made fitteds, back from Charlie's newborn days and re-purposed them into training pants.

Charlie was born before I finished these and quickly discovered two things. There was no way my five pound newborn was going to wear those diapers, and I became addicted to pocket diapers instead of fitteds. The pattern I used was for a small, but clearly I did something wrong, because they fit Charlie fine right now at over two. These aren't water proof, but they do have four to five layers of microfiber wash cloths in them. Charlie doesn't even come close to soaking through the layers when he has an accident (and thus saving his pants), but that might be abnormal...I'm not sure what the peeing volume statistics for toddlers are.

Two layers of flannel, one layer of decorative stretch fabric for the outer layer, five layers of the aforementioned microfiber as a super soaker layer, then I turned it right side out.

Sewed up the tabs where you would normally apply velcro or snaps, and put elastic around the waist.

And ta-da! Homemade pull ups. They would never be suitably leak proof for a baby, but in their new life as training pants for a toddler they are a lifesaver.

I've half heartedly had Charlie potty trained for awhile, but last Saturday I woke up and decided it's time to stop changing diapers for good. I never really hated the diaper stage (as much as I hate say...reality television or traffic on the five), so I wasn't in a terrible hurry to potty train. I think my ambivalence this time definitely had to do with cloth diapers. They were so cute, and soft I didn't want to give up that last vestige of babyhood. (even though in full disclosure, I switched to disposables after Charlie turned two)
Charlie, like his brother before him, transitioned fairly seamlessly to life in underwear, unlike Jamie, it did not require shooting Charlie's diapers with a 12 gauge to accomplish the transition. However, sometimes you just need pullups. Naps, road trips, gymnastics, life is too full of opportunities for major accident catastrophes, but pull ups are outrageously expensive. So I pulled out a box of half-made fitteds, back from Charlie's newborn days and re-purposed them into training pants.
Charlie was born before I finished these and quickly discovered two things. There was no way my five pound newborn was going to wear those diapers, and I became addicted to pocket diapers instead of fitteds. The pattern I used was for a small, but clearly I did something wrong, because they fit Charlie fine right now at over two. These aren't water proof, but they do have four to five layers of microfiber wash cloths in them. Charlie doesn't even come close to soaking through the layers when he has an accident (and thus saving his pants), but that might be abnormal...I'm not sure what the peeing volume statistics for toddlers are.
Two layers of flannel, one layer of decorative stretch fabric for the outer layer, five layers of the aforementioned microfiber as a super soaker layer, then I turned it right side out.
Sewed up the tabs where you would normally apply velcro or snaps, and put elastic around the waist.
And ta-da! Homemade pull ups. They would never be suitably leak proof for a baby, but in their new life as training pants for a toddler they are a lifesaver.
Whimsical Mushroom Ornament Tutorial
Stinginess is an art I'm well versed on. It manifests itself by my unholy shock at people who grate too much fresh parmesan on their spaghetti, or hog more than their fair share from a pitcher of juice.


Step 6


An easy and inexpensive to add some magic to your tree.
I'm trying to be better. I do genuinely want to be a generous person, but if you are impressed by any outpouring of extravagence from my family...it is probably all Jim's doing. He is the opposite of a selfish person.
Tight-wadded-ness is not all horrible though. It manifests itself in useful ways like our Christmas tree. This year it cost us nothing, helped preserve a forest, had no plastic factory effect on the environment, and is so wonderfully imperfect I could just kiss it. It's decked in dragon, owl and mushroom ornaments, with a few random harps, snowflakes and silver balls thrown in for good measure. I'm working on a garland now... but that's a post is for another day.
It's a magical tree.
And I love the mushroom ornaments so much, I had to share.
Step 1
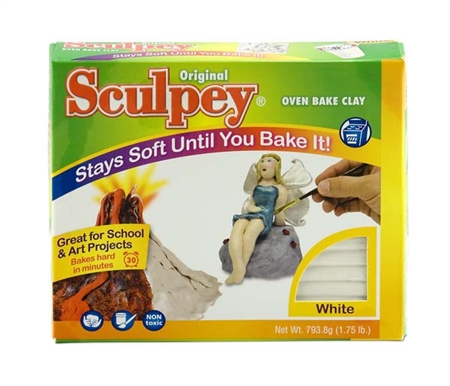
Get some Sculpey or any other sort of oven bake clay. They sell it at every Walmart, Jo-Anns and craft store. Like most things however, it's cheaper on the good ol internet. I personally need to invest in a 30lb box of it. If you don't have money for Sculpey, I bet you could make some salt dough and bake that too.
Step 2
Grab a glob and roll it into a ball the size of a Quarter. Flatten it in the palm of your hand with your thumb until it resembles the top of a mushroom.
Step 3
Cut some thin jewelry wire (or a paper clip). Twist it into a loop.
Step 4
Make another ball of clay, this time smaller...about the size of a dime. Roll it between your hands until it lengthens out to something resembling the stem of a mushroom.
Step 5
Insert your twisted wire into the the top of the mushroom. Connect the stem. Use your fingers to gently mold the two pieces together. Smooth out any lumps and holes that may have appeared doing the metal insertion surgery.
Step 6
Bake at 275 for 30 min. (or if using salt dough, whatever the reccomended time is)
Step 7
Paint. I did mine varying shades of orange and yellow. Bethany would probably choose a different color. ;-)
Step 8
Attach ornament hook, ribbon or fishing line and hang on your Christmas tree!
An easy and inexpensive to add some magic to your tree.
Dragon Wings Tutorial
Esther:
I wrote four thousand words today and that doesn't count facebook, forums, blogging or emails.
For some people that may be totally normal, but for me it means...
- My living room has been turned into a fort containing (or built out of) every pillow, blanket, and couch cushion we own, and is furnished with the contents of my entire kitchen.
- My kids ate cold cereal for dinner out of square tupperware because all the bowls are dirty.
- I've consumed roughly around two frappes, four cups of spiced black tea and a renegade cup of green tea here and there.
- I stared at my husbands empty pants and wondered where the heck he was.
- I was possessed by a sudden and unstoppable need to put the bathtub mat in the laundry.
- I started jumping at and correcting anyone who used an adverb in a spoken sentence.
I've lost it.
In this delightful world where nothing is as it should be, Jamie decided he didn't want to be Buzz Lightyear for Halloween anymore. He wanted to be a dragon. A deadly nadder to be exact.

It was on the tip of my tongue to tell him no. I probably should have told him no. I mean, he already agreed to be Buzz Lightyear and we're coming down to the home stretch with reformation day/fall festival/all hallows eve/halloween/whatever-you-want-to-call-it just around the corner. But as the word "NO" was on its way out of my mouth I suddenly recalled that dragons have wings. I had hitherto counted my life hopelessly devoid of wings because I have boys and I can't really dress boys up as the dreamy little fairies I imagine. But it dawned on me with stunning clarity, that dragons are like fairies for boys. They can fly, and do magic, but they're way more badass and can breathe fire.
The truth of the matter is, I can never pass up an opportunity to make a pair of wings no matter how silly or nonsensical it may be, and thus we threw bedtime out the window and constructed a pair of preschool crafted, adult assisted dragon wings.
Step 1: Hanger.
 Unravel and bend in wing like position.
Step 2: Dragon shoulder blades.
 Use one of the slightly less dirty bowls in your dishwasher and draw two circles on cardboard. Connect the circles and cut out with a straight knife (scissors work in a pinch).
Step 3: Perform Frankenstein surgery on shoulder blades and wing bones.
 Use masking tape, duct tape, floral tape, electrical tape or any other sort of tape you have to slash the wings onto the shoulder blades.
Step 4: Breathe life into the bones.
 Have preschooler paint bones with the color of his choice.
Step 5: Surgically graft on skin.
 Plug in the hot glue gun. And perform some good old fashioned hot glue surgery to something that probably should be sewn (in a perfect world). I used cheese cloth, but you could use whatever wispy, flowy fabric you have on hand.
Step 6: Add pigment to skin.
 Re enlist preschooler into painting skin. Dip their fingers in contrasting color and let them have at it.
Step 7: Hang on door to dry and send preschooler to bed.
 Ta daaa! Genuine dragon wings made by the loving hands of a 5 year old under the guidance and supervision of his harrowed mother.
*rest of the costume forthcoming.
I wrote four thousand words today and that doesn't count facebook, forums, blogging or emails.
For some people that may be totally normal, but for me it means...
- My living room has been turned into a fort containing (or built out of) every pillow, blanket, and couch cushion we own, and is furnished with the contents of my entire kitchen.
- My kids ate cold cereal for dinner out of square tupperware because all the bowls are dirty.
- I've consumed roughly around two frappes, four cups of spiced black tea and a renegade cup of green tea here and there.
- I stared at my husbands empty pants and wondered where the heck he was.
- I was possessed by a sudden and unstoppable need to put the bathtub mat in the laundry.
- I started jumping at and correcting anyone who used an adverb in a spoken sentence.
I've lost it.
In this delightful world where nothing is as it should be, Jamie decided he didn't want to be Buzz Lightyear for Halloween anymore. He wanted to be a dragon. A deadly nadder to be exact.

It was on the tip of my tongue to tell him no. I probably should have told him no. I mean, he already agreed to be Buzz Lightyear and we're coming down to the home stretch with reformation day/fall festival/all hallows eve/halloween/whatever-you-want-to-call-it just around the corner. But as the word "NO" was on its way out of my mouth I suddenly recalled that dragons have wings. I had hitherto counted my life hopelessly devoid of wings because I have boys and I can't really dress boys up as the dreamy little fairies I imagine. But it dawned on me with stunning clarity, that dragons are like fairies for boys. They can fly, and do magic, but they're way more badass and can breathe fire.
The truth of the matter is, I can never pass up an opportunity to make a pair of wings no matter how silly or nonsensical it may be, and thus we threw bedtime out the window and constructed a pair of preschool crafted, adult assisted dragon wings.
Step 1: Hanger.
 Unravel and bend in wing like position.
Step 2: Dragon shoulder blades.
 Use one of the slightly less dirty bowls in your dishwasher and draw two circles on cardboard. Connect the circles and cut out with a straight knife (scissors work in a pinch).
Step 3: Perform Frankenstein surgery on shoulder blades and wing bones.
 Use masking tape, duct tape, floral tape, electrical tape or any other sort of tape you have to slash the wings onto the shoulder blades.
Step 4: Breathe life into the bones.
 Have preschooler paint bones with the color of his choice.
Step 5: Surgically graft on skin.
 Plug in the hot glue gun. And perform some good old fashioned hot glue surgery to something that probably should be sewn (in a perfect world). I used cheese cloth, but you could use whatever wispy, flowy fabric you have on hand.
Step 6: Add pigment to skin.
 Re enlist preschooler into painting skin. Dip their fingers in contrasting color and let them have at it.
Step 7: Hang on door to dry and send preschooler to bed.
 Ta daaa! Genuine dragon wings made by the loving hands of a 5 year old under the guidance and supervision of his harrowed mother.
*rest of the costume forthcoming.
Make your own...... boots?
My feet are claustrophobic. Maybe it's because I've always run around barefoot most of the time, maybe it's because my feet are super wide, but whatever reason, I hate wearing any sort of shoes that don't slip off easily. (Not that I want to! I have some lovely stiletto oxfords I always intend to wear more often.)
Anyway, when Esther started telling my about her new boot fascination, I didn't at all sympathize. Over the knee socks? Pure wonderfulness. But over the knee boots sound like some kind of torture device, or at the very least a leg prison. I have a pair of amazing Merrell calf boots that wear like a dream and leave my feet feeling ache-free after hours of walking, but even in such comfort I can't wholly shrug off the feeling of confinement.

So after one of our many recent conversations on the subject of over the knee boots, I was thinking through the reasons that I had thought they wouldn't possibly work for me. And then I realized there might be a compromise.

I started with a pair of shoes I never, never wore but had kept because they do seem so nice and cosy, and I was always sure that when winter came I would actually wear them.

The only other essential ingredient was.... old sweaters. Impressive how many uses there are for musty cashmere.

I cut the arms off along the curve of the darker sweater for the main body of the boot and the arms off straight across the lighter sweater for the upper/cuff.

The curved end of the sleeve connected to the shoe perfectly. I turned it inside out, slipped it on, tucked it in, and pinned in back to make the shape more leg-friendly. The other end of the sleeve had been cut across for some other project.

Just a quick serged edge finished up the shaping of the leg portion. Well, it would have been quick if my serger hadn't attracted a fanatical stalker. The poor machine was groped and grabbed and beaten, which in turn meant I had to rethread it multiple times while attempting to fend off the unwanted attentions. But in the end, the seams were serged.

Next came the lighter sweater. I trimmed off the lower sleeve so that the width was about the same as the top of the darker sweater.

Right sides of the darker and lighter sweaters together, pinned, serged.
All that was left really was to attach the leg portions to the foot portions. I decided to add a little stretch lace to cover the seam though. Then I glued sweater to shoe.

The finishing touches were buttons and fabric paint.
They don't really look 100% like the real deal, but I think they'll accomplish all the marvels of over the knee boots without causing my feet to hyperventilate. So thank you, Esther, for convincing me to at least give the concept a try.

Going to the Birds
"Peacocks! Sink me! Think ye, Sir, how those feathered boys love to flaunt their tails!"
~The Scarlet Pimpernel musical

I love feathers, and the colors in my wedding party were jewel-toned, so peacock boutonnières seemed like a good idea at the time. The groom and groomsmen were gracious enough to accept without complaint (at least no complaint to me).

Even more so than flowers, feathers can be used to ornament pretty much anything. When was the last time you saw a real flower double as a pen?

And even the fluffiest of leis generally won't rival the size and comfort of a feather boa (Could you stuff a comforter with rosebuds and be warm all winter?).

Feather trimmed dresses can have a fairy elegance.
 But I'm guessing that they're probably not to be tossed in the washing machine or tumble dried.
Print tee shirts are a way to enjoy the charm of feathers without being forced to cater to their delicacy.

Even without the benefit of their tactile enchantments, feathers are inspirational works of art.

Hats trimmed in feathers have always been in vogue, it seems.

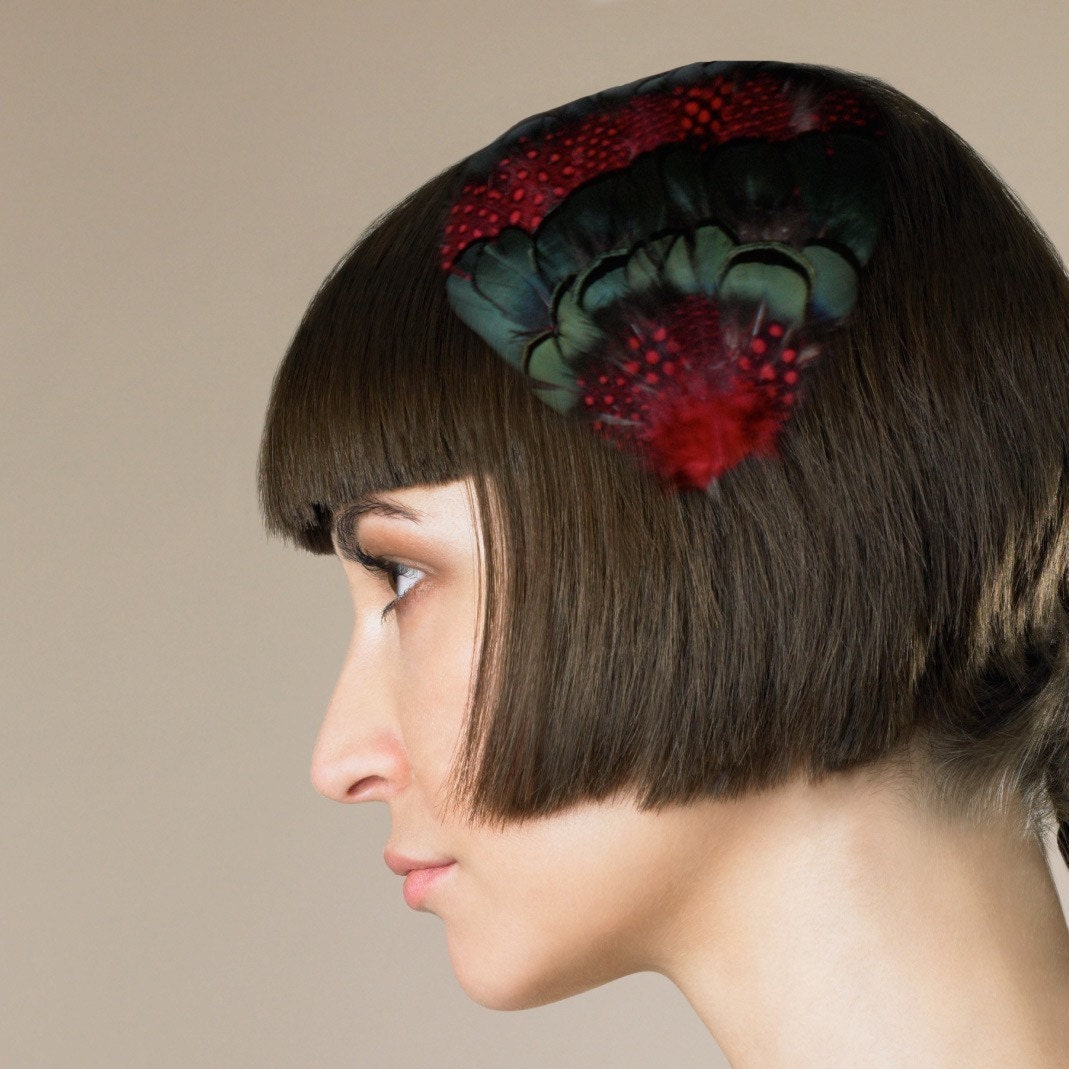
Feathered headpieces, on the other hand, have not always been as popular. When I got married, I looked high and low for a feather headpiece, to no avail. Now. of course, you can buy one pretty much anywhere.

Although etsy has a corner on the market of beautiful trinkets, you can seriously find feathered headbands, hair clips, and fascinators all over the place now. That is such a plus to liking things that are fashionable; you don't have to waste time in the frustrating and ultimately fruitless search for them.

Unfortunately, supply doesn't always equal necessary demand. Gorgeous feather headpieces are freely available, but I no longer am in search of that perfect completion of the wedding ensemble (a generous splash of pearls ended up filling that role).

And this is where the DIY trend comes in so very handy. Because perhaps I don't feel like justifying shelling out wads of cash for new accessories, but I can certainly find an excuse to grab a glue gun and some supplies from my sewing room and make use of the time I sit watching Rear Window with the family.
Start out with a skeleton base roughly the shape and form of the piece you have in mind (I used the same gauge of wires that I used for the crown).

Cover all the ugly edges (I used hot glue to apply lace around the edges, tulle over the top, and velvet ribbon bordering between the two).

Layer feathers and add a touch of tulle.

Attach a clip, ribbon, headband.... or use a hatpin.

Now if only chicken feathers were as attractive as peacock and pheasant, our backyard would be a most richly attired creature.